
Neko - A brief history and porting to Javascript
In the early 90’s, being a frisian kid obsessed with computers there weren’t a ton of ways to get access to new software or learn more about computers.
The two main ways were exchanging 3.5” diskettes with friends, or go to the library. One book I remember more than others was “Windows for Kinderen” (“Windows for Kids”) by Addo Stuur.
I must have been around 10 years old and was obsessed by this book. It covered Windows 3.0, and when you got the book from the library, it came with a diskette filled to the brim with shareware. Mostly games and useless toys, but it still baffles me thinking they were able to cram it all on a 1.44 megabyte disk. Using floppys from the libraries was even back then a risky business given that they’re writable! Luckily this mostly went ok.
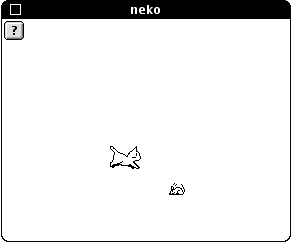
One that I remembered particularly well was ‘Neko’, an application that renders a cat in a window that follows your mouse. This must have been a popular thing to make at the time, because the diskette somehow had space for 3(!) different ports of this same application.
I don’t know what reminded me of Neko last week, but I started doing some more research, and found out that the first version was written all the way back in the 1980’s by Naoshi Watanabe for the NEC PC 9801.
After that, it was ported to the Macintosh in 1989 by Kenji Gotoh, and this art style seems to be the basis of almost every future port:
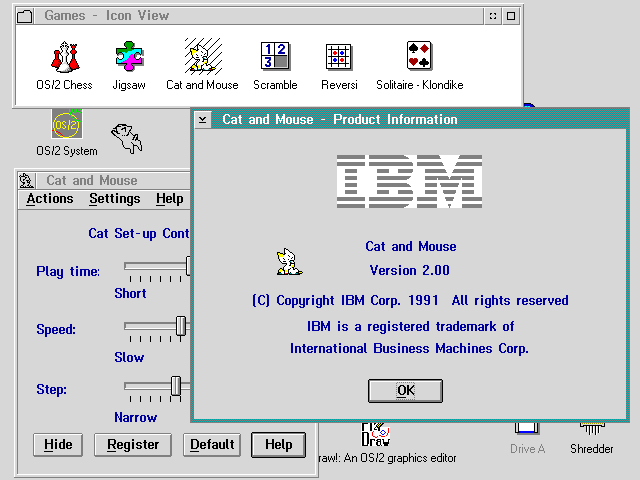
In 1991, IBM included it in OS/2! Apparently they paid 300,000 YEN, which is about $3000 CAD in todays money. At this point it also became public domain.
Since then there’s been countless ports for every platform. If you’re running linux you might be able to install one by just running:
apt install oneko
I also decided to make a version. Neko is now close to 40, so my Neko is no longer interested in following the mouse, and prefers to just sleep all day unless you wake it.
If you want to know more, the Eliot Akira wrote a great article with way more information about Neko and all its ports, this is also where I took the screenshots from this page.
You can also check out the source of my port ‘jneko’. It uses the assets of oneko, which are public domain. It was a fun exercise to create a little state machine.
Creating the assets
To create the assets for jneko, I had to convert them from the .xbm
format from oneko.
I did this with imagemagick on the command line using a command like this
to loop through all the files:
for f in ../oneko/bitmaps/neko/*.xbm
  convert "$f" `basename "${f%.xbm}.png"`
Sadly I still had to open each one of them with Gimp and add the alpha layer.
I hadn’t really heard of the .xbm format, but when I accidentally opened
one with an editor I was surprised to see that they’re actually a text
format:
#define awake_width 32
#define awake_height 32
static char awake_bits[] = {
   0x00, 0x00, 0x00, 0x00, 0x00, 0x00, 0x00, 0x00, 0x20, 0x00, 0x00, 0x04,
   0x40, 0x10, 0x10, 0x02, 0x80, 0x28, 0x28, 0x01, 0x00, 0x49, 0x24, 0x00,
   0x06, 0x44, 0x44, 0x60, 0x18, 0x84, 0x42, 0x18, 0x60, 0x82, 0x83, 0x06,
   0x00, 0x02, 0x80, 0x00, 0x00, 0x22, 0x88, 0x00, 0x0f, 0x22, 0x88, 0x78,
   0x00, 0x22, 0x88, 0x00, 0x00, 0x02, 0x80, 0x00, 0x00, 0x3a, 0xb9, 0x00,
   0x00, 0x04, 0x40, 0x00, 0x00, 0x08, 0x20, 0x00, 0x00, 0x70, 0x1c, 0x02,
   0x00, 0x40, 0x04, 0x05, 0x00, 0x20, 0x88, 0x04, 0x00, 0x10, 0x50, 0x02,
   0x00, 0x08, 0x20, 0x01, 0x00, 0x0b, 0xa0, 0x01, 0x80, 0x0c, 0x61, 0x02,
   0x40, 0x18, 0x31, 0x04, 0x40, 0x10, 0x11, 0x04, 0xc0, 0x11, 0x11, 0x07,
   0x60, 0x90, 0x13, 0x0c, 0xe0, 0xff, 0xfe, 0x0f, 0x00, 0x00, 0x00, 0x00,
   0x00, 0x00, 0x00, 0x00, 0x00, 0x00, 0x00, 0x00};
Turns out this is the X BitMap format, which has the interesting property that it aside from an image format, they’re also valid C source files. This has the advantage that they can easily be statically compiled into C files without requiring a parser.
This is really similar to the history of the JSON format, which was designed
to be a subset of Javascript, allowing Javascript programs to read the
format without a new parser (using eval). Ironically the current JSON format
is no longer a subset of Javascript, and Javascript engines now have a
JSON.parse() function built in.
A deep dive into the source
jneko uses a state machine. All its possible states and transitions are expressed with this configuration object:
const stateMachine = {

  // Name of the state
  sleep: {

    // Which images are used for the state
    image: ['sleep1', 'sleep2'],

    // How quickly we loop through these images
    imageInterval: 1,

    // What state does this go to when clicked
    click: 'awake'
  },
  awake: {
    image: 'awake',

    // We automaticall transition to this state
    nextState: 'normal',

    // How long it takes to transition
    nextStateDelay: 2.5,
  },
  normal: {
    image: 'mati2',

    // If there's multiple nextState values, a random one is picked.
    // You make make 1 state more likely by addding it multiple times
    // to the array
    nextState: ['normal', 'normal', 'normal', 'tilt', 'scratch', 'yawn'],
    nextStateDelay: 1.5,
  },
  tilt: {
    image: 'jare2',
    nextState: 'normal',
    nextStateDelay: 1,
  },
  yawn: {
    image: 'mati3',
    nextState: ['normal', 'normal', 'sleep'],
    nextStateDelay: 1,
  },
  scratch: {
    image: ['kaki1', 'kaki2'],
    imageInterval: 0.1,
    nextState: 'normal',
    nextStateDelay: 3,
  }
};
Before Neko starts, we need to preload the images. This ensures that the animations happen instantly and not after a delay.
/**
 * The filenames are a bit funny because they were taken straight from
 * the oneko project.
 */
const imageNames = [
  'awake',
  'jare2',
  'kaki1',
  'kaki2',
  'mati2',
  'mati3',
  'sleep1',
  'sleep2',
];
/**
 * Images are actually 32x32 but it's too small for modern screens.
 */
const nekoSize = 64;
const images = Object.fromEntries(imageNames.map(name => {
  const image = new Image(nekoSize, nekoSize);
  image.src = '/assets/posts/neko/bitmaps/' + name + '.png';
  return [name, image]
}));
Finally, this class does all the heavy lifting:
class Neko {

  constructor(elem) {

    // The HTML element that hosts neko
    this.elem = elem;
    this.stateMachine = stateMachine;

    // Creating a new <img> element
    this.imgElem =  new Image(nekoSize, nekoSize);

    elem.appendChild(this.imgElem);
    this.imgElem.addEventListener('click', () => this.onClick());

    this.setState('sleep');

  }

  /**
   * This property is used to keep track of states with multiple frames
   */
  #animationIndex = 0;

  renderImage() {

    let name = this.stateMachine[this.#state].image;

    this.#animationIndex++;
    if (Array.isArray(name)) {
      name = name[this.#animationIndex % name.length];
    }
    this.imgElem.src = images[name].src;
  }

  #state = null;
  #nextStateTimeout = null;
  #imageCycleInterval = null;

  setState(stateName) {

    clearTimeout(this.nextStateTimeout);
    clearInterval(this.imageCycleInterval);

    if (Array.isArray(stateName)) {
      // If stateName was supplied as an array of strings, we'll randomly
      // pick a new state.
      stateName = stateName[Math.floor(Math.random()*(stateName.length))];
    }
    if (!this.stateMachine[stateName]) {
      throw new Error('Uknown state: ' + stateName);
    }
    this.#state = stateName;
    const stateData = this.stateMachine[this.#state];

    // If there was a nextState, we automatically transition there after
    // a delay.
    if (stateData.nextState) {
      this.nextStateTimeout = setTimeout(
        () => this.setState(stateData.nextState),
        stateData.nextStateDelay * 1000
      );
    }

    // This block is responsible for cycling through multiple images
    // of the current state.
    if (stateData.imageInterval) {

      this.imageCycleInterval = setInterval(
        () => this.renderImage(),
        stateData.imageInterval*1000
      );

    }
    this.renderImage();
  }
  onClick() {
    const stateData = this.stateMachine[this.#state];
    if (stateData.click) {
      // If the current state had a 'click' property, we'll transition
      // to that state, otherwise it's ignored.
      this.setState(stateData.click);
    }

  }

}
Now if you’d like to call Neko, make a <div id="neko"></div> somewhere. and
hook up Neko with:
new Neko(document.getElementById('neko'));
To make Neko not look ugly, tell the browser to not use anti-aliasing when scaling:
#neko img {
  /* Both are needed to support all browsers currently. */
  image-rendering: pixelated;
  image-rendering: crisp-edges;
}
Thanks for reading! If you have any comments you can reply to this tweet or this mastadon post to make it show up below this article automatically.